Here's my best attempt to explain:
1) We purchased to 36" plain doors from Lowes. They were $26 each with no holes drilled or anything.
2) We got little straight brackets to attach them to one another from the backside.
3) We filled the seam down the middle with wood putty and sanded (and repeated). We probably could have sanded a bit more, but you don't really notice.
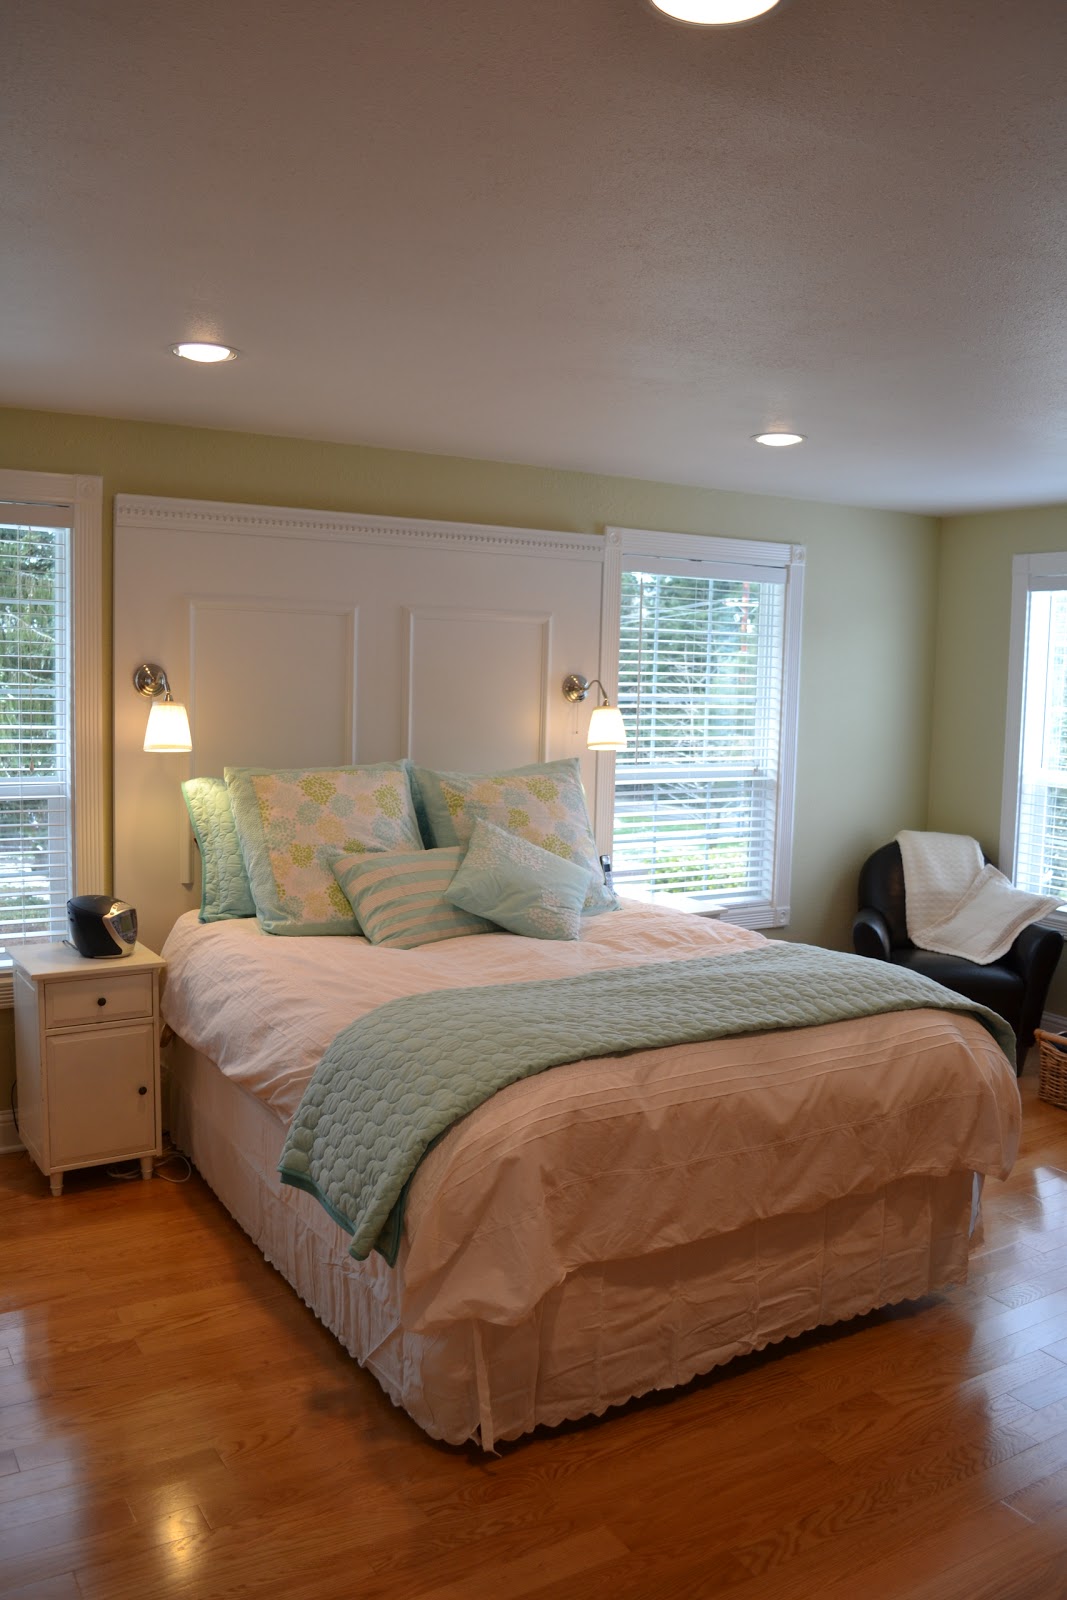
4) I'm the planner/measurer, so I laid out the pattern that I wanted with the molding. We got one piece of crown molding for the top, and two pieces to make up the "panels". If we were to do it again, I'd have had the panels go further down as you can see the end of the one on the left a little bit.5) We cut the molding and attached it using Gorilla glue and finishing nails. The nails were just to hold the molding down flat while the glue dried - that stuff is STRONG!
6) We caulked and sanded the nail holes.
7) Painted, painted, painted. It took 3 coats - yuck!
8) We got the sconces from good ole IKEA. Once I measured and marked for them, Jim had to drill pretty big holes to get the plugs through. Be sure to get ones that have the pull cord and NOT the switch on the electrical cord if you plan to run the cord behind the headboard. We knew we didn't want our cords to run down the front so this was important!
9) Attach the sconces.
10) Time to hang! We found really great hanging hardware at Lowes, but of course I can't find it listed on their website. They were with the picture hanging supplies. They come in two pieces, each about 6" long. One piece includes a level (how handy is that???). You attach one piece to the wall and the other to the back of the headboard. They are angled so that when you slide the headboard (or whatever you're hanging) down, the pieces slip right together. I really wish I'd taken a picture because it's tough to describe, but a great invention. Each one is supposed to hold 75 lbs, but we got two because we didn't want all of the weight of such a wide piece to be right in the middle (and on the seam).
1 comment:
LOVE it! Great job...I'm inspired to get some DIY projects started!
Post a Comment